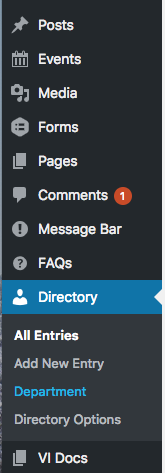
 When the VI Directory is installed on your site, you will see a Directory option in your dashboard. Follow these instructions to start setting up your website’s directory.
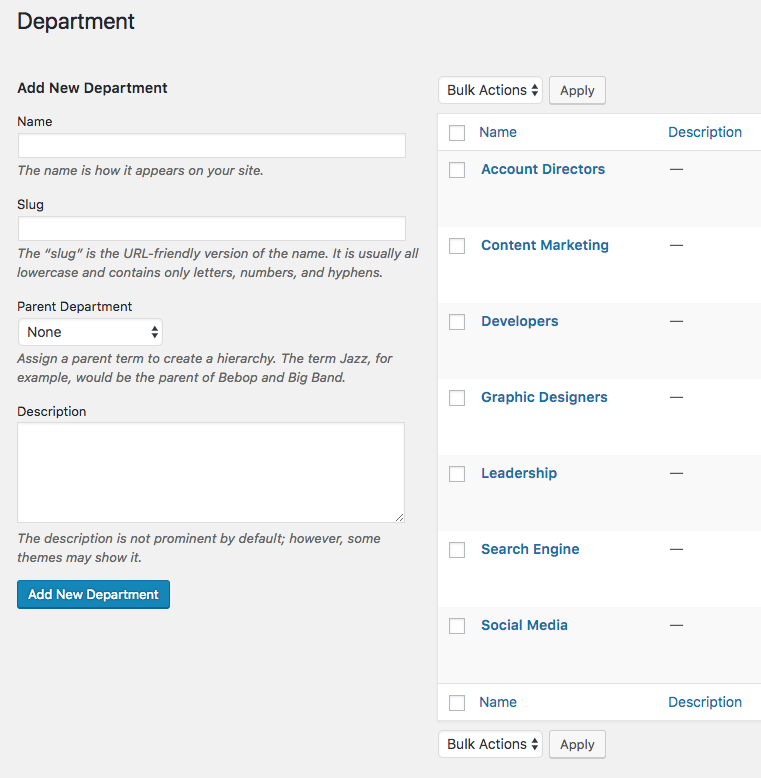
Organizing Departments
Enter a new “department”, or category, you would like to use to filter entries. At Vivid Image, our directories are categorized by the employee’s work title (Example: Account Directors, Developers, Graphic Designers, Social Media, etc.). By adding department categories, it allows your visitors to filter through your directory faster by choosing a category they are looking for.
To add a department
- Under “Directory” in the Dashboard, select “Department”
- Add the name of your new department and add a slug name (WordPress will auto-generate a slug name if you leave it blank).
- You can select a parent if you like. This is a good way to organize your departments if there are multiple levels of entries.
(Example: Parent Category could be Staff, subcategories could be Educators, Sales, Managers – etc.)
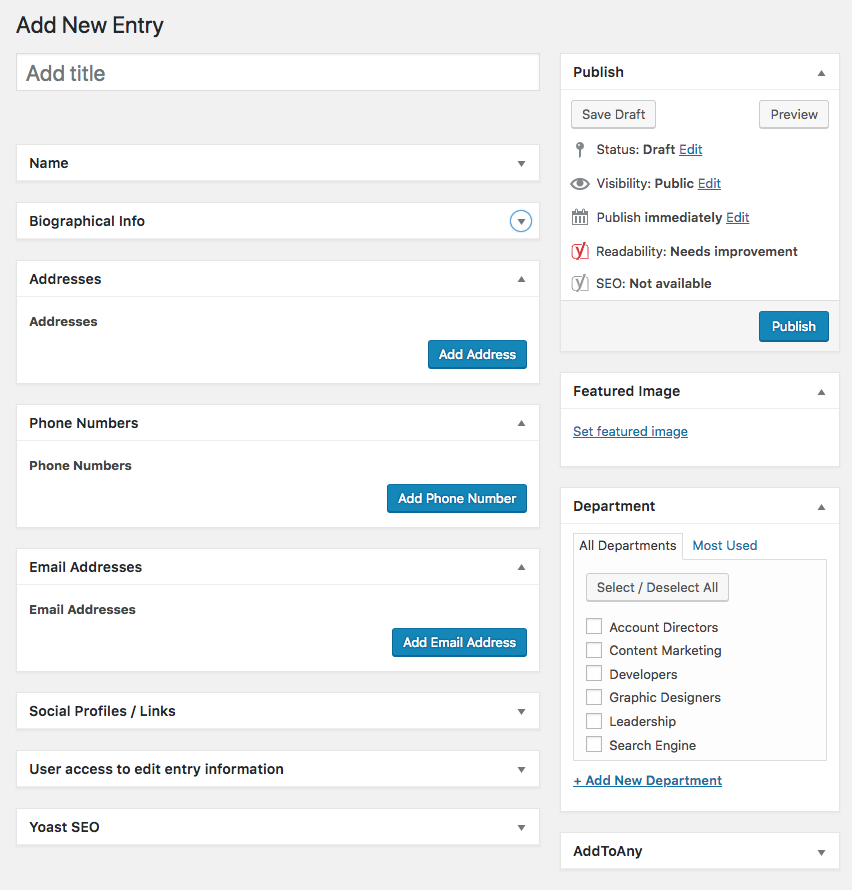
Add a New Entry
Each individual entry is added to the Directory and given an assigned department.
To add a new entry
- Under Directory in the Dashboard, select “Add New Entry”
- Enter the title of your entry.
- Add Name, Address, Phone Number, etc.
- Under Featured Image, Select “Set Feature Image” and select your file from the media library to use for your image.
- Departments. Select the Departments you want your this profile to be assigned to (it can be assigned to as many as you like). If a department isn’t available, create it by clicking on the “Add New Department” link below the “All Departments” box.
- Click “Publish”.
- REPEAT for all Entries.
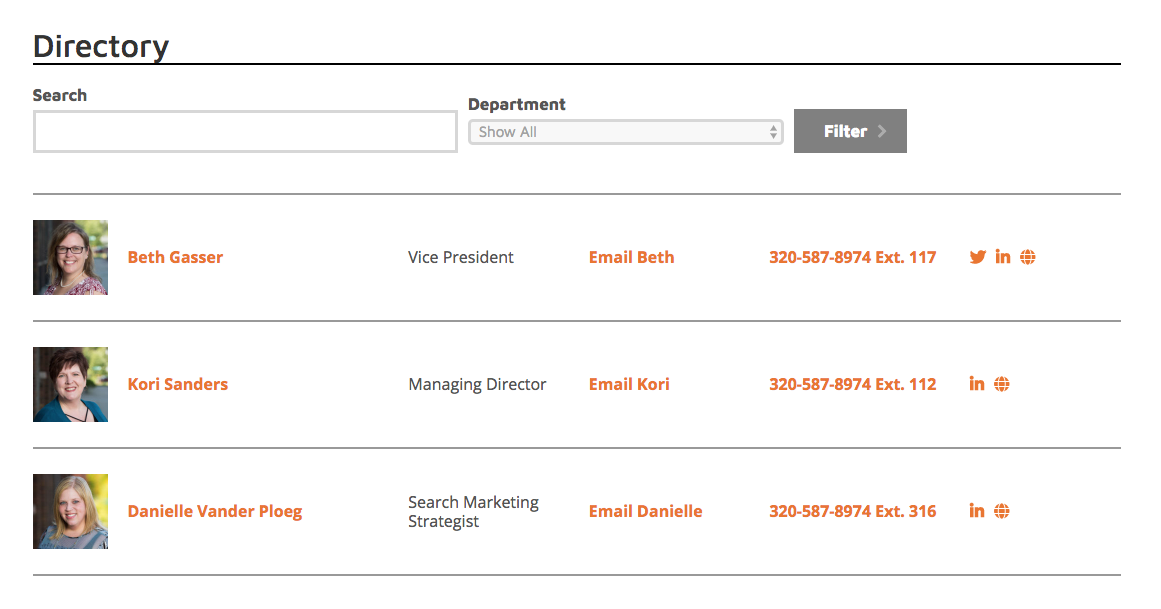
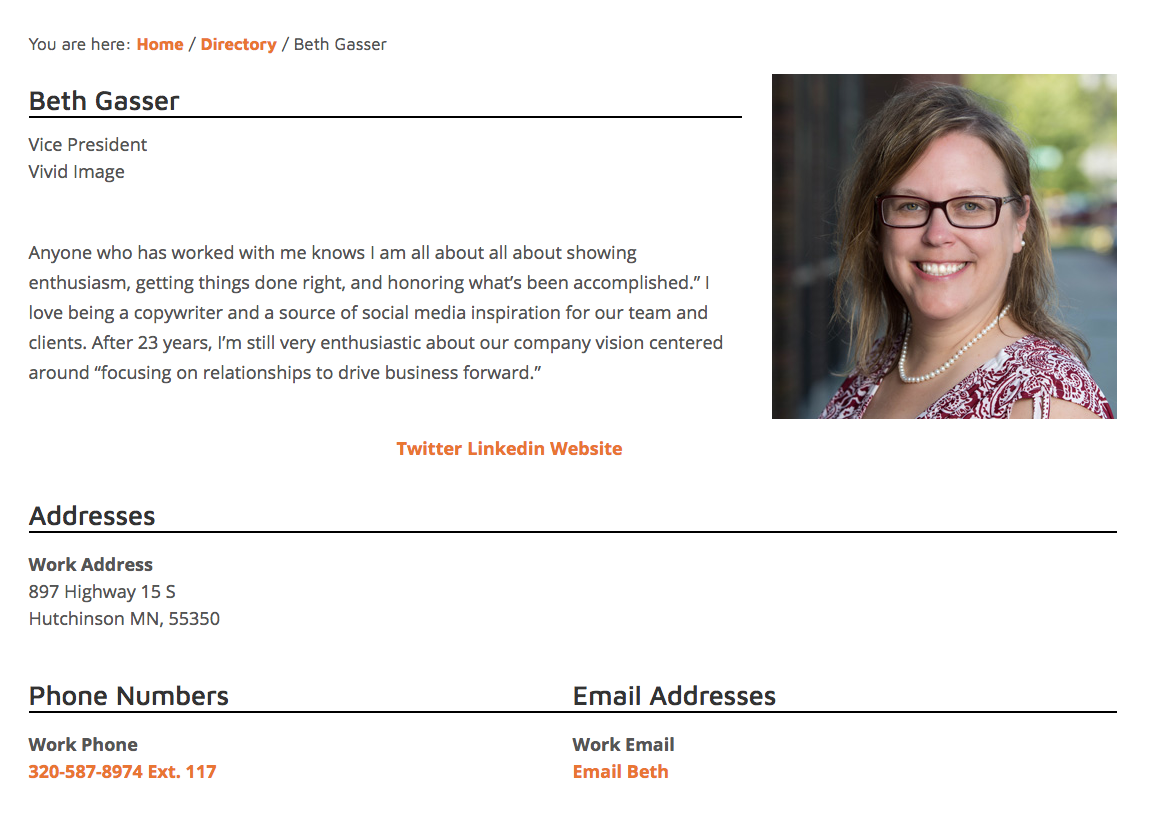
Directory Example
The directory will appear on your site similar to this example.
When a staff member is selected, it will load a new page like this next example::
The Directory will be styled to match the design of your site. Talk to your Account Director if you want to know more about styling options.