Notifications allow you to manage the emails that are automatically sent as a result of your visitor filling out a form on your website and clicking submit. You have the ability to have a customized email sent to an Administrator (you by using Notifications) and to a User (the visitor by using Confirmations).
Notification to Administrators
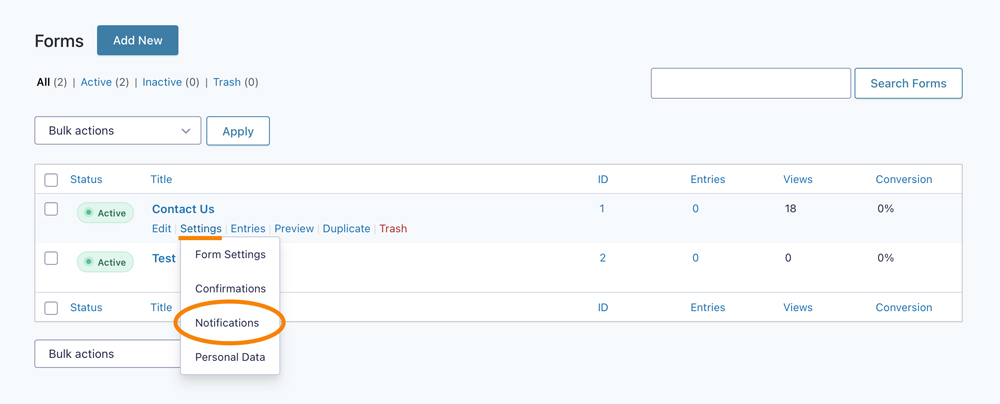
Click on Forms in the left navigation. Find the form you want to edit. Hover over the title, then Settings, and finally click on Notifications. Note: You can also simply click the form title to open the form to see a settings tab on the top of the page to access the same menu options.
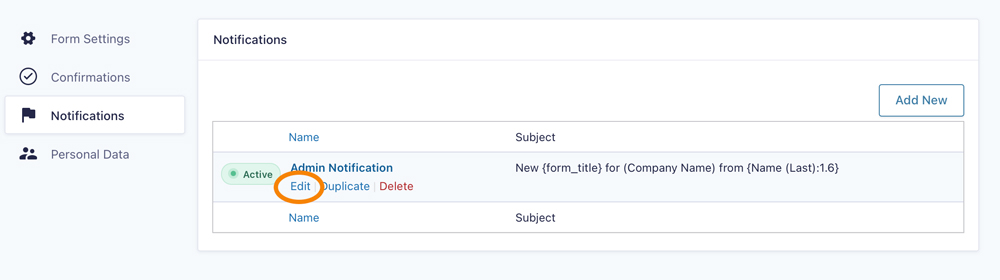
From there, hover over the notification name to view/click on the Edit link.
 1: Merge Tags

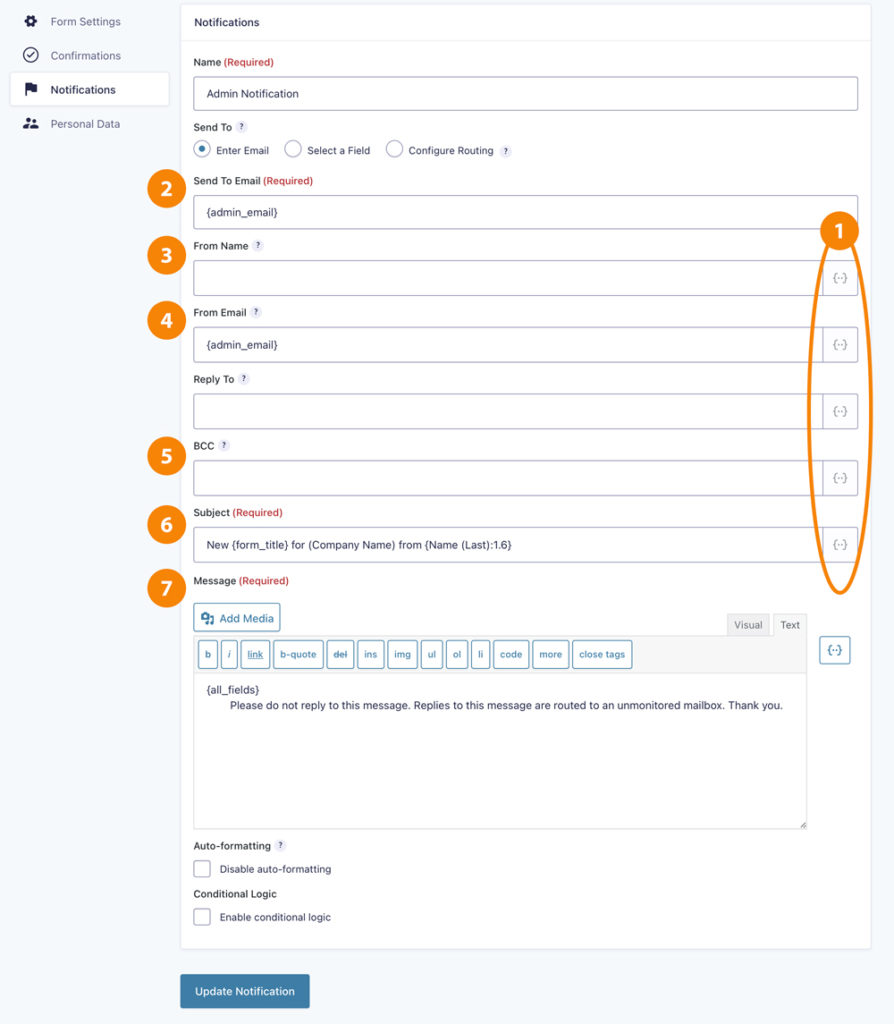
You can use the merge tags, also known as the “Insert Form Field”, to auto-generate content based on how the user filled out the form. Merge tags can be used anywhere you see {..} on the right. Click on the symbol to get a list of field from the form to use.
2: Send To Email
Enter the email address you would like the administrator notification email sent to. You can optionally select Routing which allows you to route the email based on field selections.
Note: This most commonly is set to the email address within your company that you want incoming emails to go to — such as [email protected]
3: From Name
Enter the name you would like the administrator notification email sent from. This is a great place to use the Name Merge Tag to automatically pull in the name the user entered into the submitted form.
4: From Email & Reply To
You must enter noreply@(enter your domain here).com email here to avoid violation of DMARC (Domain-based Message Authentication, Reporting & Conformance) and to help avoid email “phishing” and “spamming” schemes. See Why do you have to use [email protected] to learn more.
5: BCC
Enter a comma separated list of email addresses you would like to receive a Blind Copy of the administrator notification email.
6: Subject
Enter the subject you would like used for the administrator notification email. The Form Title and Name are the most common merge tags used in this field. For example use New {form_title} submission from {Name} so when Jane Doe submits a Contact Form it will appears in Bob’s email with the subject line New Contact Form Submission from Jane Doe.
7: Message
Enter the body message you would like used for the administrator notification email. The merge tag variable All Submitted Fields {all_fields} is the most common tag used to show all fields from the form.
It is best practice to add a disclaimer that the user is unable to respond to the message received. Example: “Please do not reply to this message. Replies to this message are routed to an unmonitored mailbox. If you have questions please go to (your contact page of your website url here) . You may also call us at (your phone # here).”
Confirmations to Users
Confirmations lets you control what message or page is shown after the user hits the submit button. Setup your confirmation settings by clicking the menu item on the left, as shown below, or under settings when you are editing your form. Hover over your default confirmation title to see an Edit option. Next, you will see the screen here:
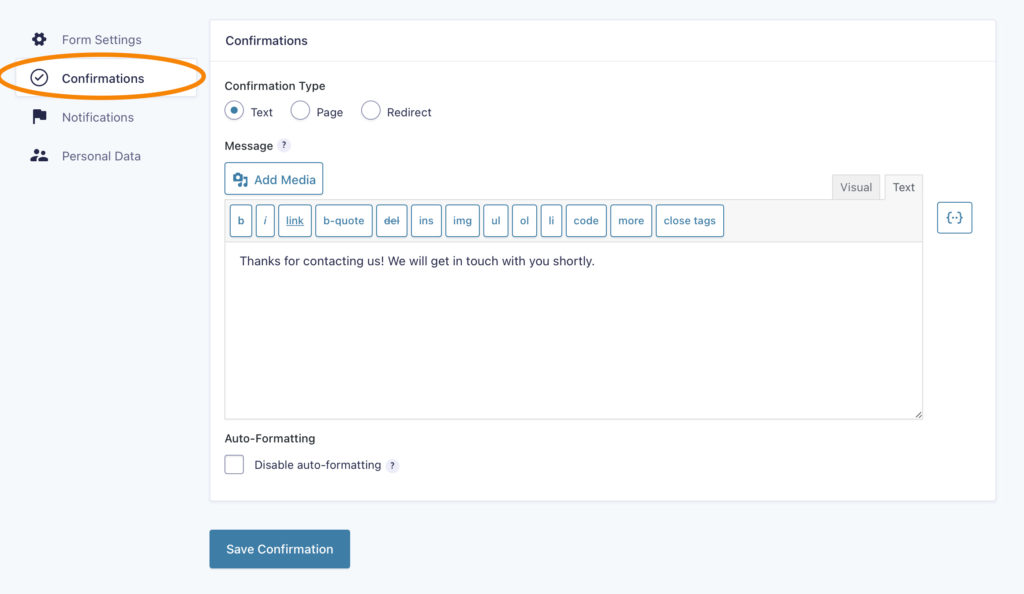 Confirmation Type
Select the type of confirmation you want sent. Text is the most commonly used confirmation. When this is selected, the user will see your message replacing the area the form was showing on the page. In the example here, “Thanks for contacting us! We will get in touch with you shortly.” will show after they hit the submit button.
If you choose Page for your Confirmation Type, you will have to create a new page before you can complete this step. Once it is created, it will show up in the dropdown menu.
If you need them to go to a page that is not on your website, use the Redirect option. This lets you paste in a url.
Message
Enter the message you want your user to receive after they have submitted the form. You may insert form merge tags (as explaining in the notifications area above) in this field.
Save Confirmation
Click the Save Confirmation button and you are done. It’s that easy!