Remember that additional fields are a PRO-exclusive feature. So, as with recurring events, you can skip this section if you’re using only using The Events Calendar. If you are using PRO, you can read on for a walkthrough of the process.
To add additional fields to your events:
Navigate to Events > Settings
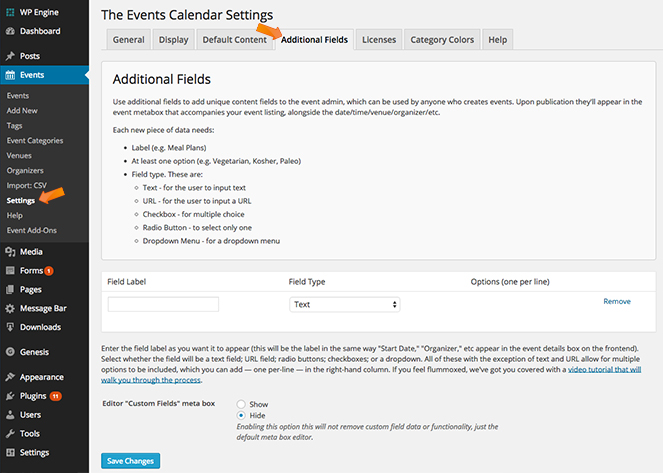
Click the “Additional Fields” tab.
You’ll see three areas to configure: Field Label, Field Type, and Options (one per line).
The Field Label determines how this attribute appears on the frontend. If you’re aiming to include a “Host” in your events, for example, you’d include the word “Host” here. No need to add the separator colon; the system will throw that in automatically upon publication.
The Field Type determines what type of field this will be. This includes:
- Text Field: event admins can enter whatever they want
- Radio: pre-populate the options and event admins can select one of them
- Checkbox: similar to Radio except allows event admins to pick multiple selections instead of just one
- Dropdown: pre-populate the list with options and event admins can select one from a dropdown that appears on the event creation screen
Select the Field Type you want for this attribute. Once you select a Field Type, you’ll be able to fill in the options. As the header indicates, you should include one option per line in this text field. You can include as many or as few you as you see fit. You can always edit this list later as needed.
You can add more custom fields by selecting the “Add Another” link that appears on the far right.
Make sure you save your changes before navigating to another tab, or none of your custom attributes you will be available.
Any custom attribute data added on the Settings page will be available to all users for all events that are created going forward. If you ever want to remove an attribute from the site, which will remove it from any existing events it may be assigned to, just come back to this Settings page and hit the “Remove” link.