It is important to always upload a file at the largest size that you want it to be viewed at.
WordPress can always make the image appear smaller on the page/post – but when clicked on, the image can not get larger than the uploaded size. You will want to be sure to upload the file at the largest size it will be viewed at.
For example: If you have a small image of a map on your page that you want people to be able to click on and print out, you will want to upload it as the size you want your user to be able to print it as – even if you want it to appear as a small image on your page or post. This way, when the image is clicked on to be printed, it will print at full size and be readable.
- To learn more about adding images see our post called Add a New Image.
Changing the size in the editor
Once your page or post has been created, you can change the size of that an image appears on the page/post within the editor at any time. There are a few different ways to do this. Below are two options:
- First Option: Click on your image in the editor, click on the “Edit” button, then click the “Edit Original” button. On the right-hand side, insert the image size you want to scale the image to. When you’ve entered the correct size, select the “Scale” button.
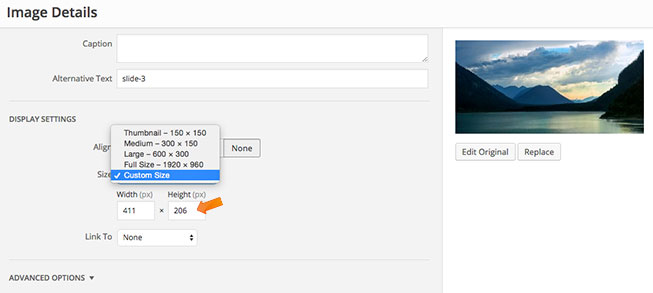
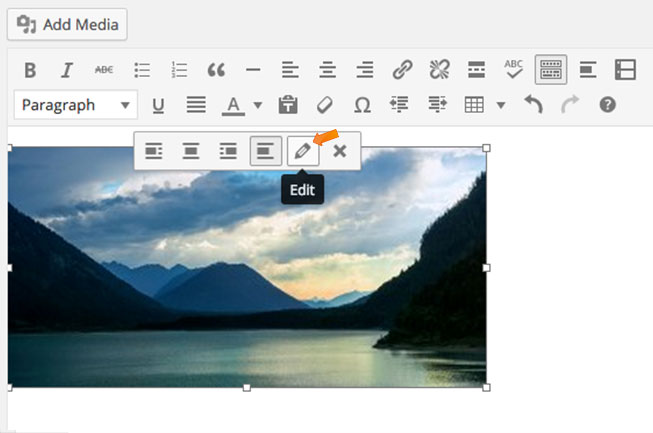 Second Option: After you click on the image and hit the “edit” icon, you can choose the preset sizes from the dropdown. Your options will be: Thumbnail (note that the Thumbnail option may crop off some of the image in order to create a perfect square), Medium, Large, Full Size or Custom Size.
- If you click on Custom Size, you will be able to enter the exact size you would like your image to appear on the page. Be sure to click Update when you are finished.
- If you click on Custom Size, you will be able to enter the exact size you would like your image to appear on the page. Be sure to click Update when you are finished.
Make an Image Clickable
If you want the user to be able to click on the image on your page/post and see it at full-size, you can choose this option when adding an image into the page or editing a photo that’s already been added to your page.
 After clicking “Add Media” from within a page or post, click on the image you want to add.
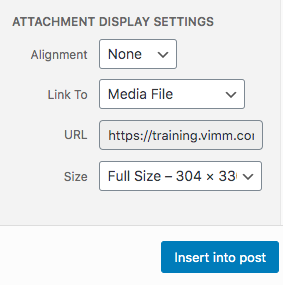
- Beneath that image on the bottom right-hand side next to “Link to”, choose “Media file” from the dropdown.
- Then, click “Add image”.
OR if your image was already added to the page or post:
- Click on the image, then hit the “edit” pencil icon.
- Beneath Attachment Display Settings and next to “Link to“, select “Media File” from the dropdown.
- Click the blue “Update” button once you’re finished.
If you don’t want the image to be a link and open to its full size, just leave this dropdown as default “None”.